With the latest GPUs pushing the boundaries of gaming and creative work, many enthusiasts are eager to squeeze out every bit of performance possible. Overclocking your graphics card can unlock incredible speed boosts, but it requires a careful approach to avoid damage and ensure stability.
Whether you’re aiming for smoother gameplay or faster rendering times, understanding safe overclocking practices is essential. In this guide, I’ll walk you through practical steps that I’ve tested myself, helping you get the most from your GPU without the guesswork.
Ready to take your graphics card to the next level? Let’s dive in.
Understanding Your GPU’s Limits and Capabilities
Identifying Your Graphics Card’s Baseline Performance
Before you even think about tweaking anything, it’s crucial to know where your GPU stands out of the box. Most modern GPUs come with factory-set clocks and voltages optimized for balance between performance and power consumption.
I usually start by running a benchmark tool like 3DMark or Unigine Heaven to get a clear snapshot of my card’s baseline performance. This helps me compare results later and understand the real impact of overclocking.
Also, monitoring temperatures and power draw during this phase gives me a feel for how close the card is already running to its limits.
Recognizing Safe Operating Temperatures
One of the biggest risks when pushing a GPU beyond its default settings is overheating. Each model has its own “sweet spot” temperature range where it performs optimally without risking damage.
From my experience, keeping the GPU under 85°C is a good rule of thumb, though some newer models can handle slightly higher temps. I use tools like MSI Afterburner or GPU-Z to keep a constant eye on temperatures during stress tests.
If your card starts hitting the high 80s or 90s regularly, it’s time to dial back or improve your cooling setup.
Power Limits and Voltage Considerations
Increasing the power limit and adjusting voltages can unlock higher clocks, but it’s a delicate dance. Raising the power limit by 10-20% often gives the card more headroom for stable overclocking.
Voltage tweaks should be minimal unless you’re experienced since pushing too much voltage risks shortening the GPU’s lifespan. Personally, I prefer incremental voltage increases and watch for instability signs like crashes or artifacting.
Patience here pays off because stability is more valuable than chasing the highest frequency number.
Step-by-Step Overclocking Workflow for Stability
Incremental Core Clock Adjustments
Jumping straight to a high clock speed is a common rookie mistake. Instead, I increase the core clock in small steps of 15-25 MHz, then test stability after each increment.
Stress testing with tools like FurMark or running demanding games helps spot early signs of instability. If a crash or graphical glitch happens, I dial the clock back by 10 MHz and retest.
This back-and-forth approach is slower but ensures your system remains rock solid.
Memory Clock Tweaks and Their Impact
Memory overclocking can yield impressive performance boosts, especially in bandwidth-heavy workloads like 3D rendering or texture loading in games. I follow a similar incremental approach with the memory clock, usually starting with 50 MHz steps.
Unlike core clocks, memory overclocks often have a less direct impact on temperatures but can cause subtle visual artifacts if pushed too far. If you notice flickering textures or crashes, dial back the memory clock in smaller increments.
Fine-Tuning Fan Curves for Optimal Cooling
Adjusting your GPU’s fan curve is an often overlooked but critical step for long-term overclocking success. Setting a more aggressive fan profile can keep temperatures down, allowing you to push higher clocks safely.
I use MSI Afterburner’s custom fan curve feature to ramp fans up earlier, around 50°C, and max out near 80°C. Yes, it makes the card noisier, but the trade-off is worth it to maintain stability and avoid thermal throttling.
Benchmarking and Stress Testing to Confirm Results
Choosing the Right Benchmark Tools
Not all benchmarks are created equal for testing overclocking stability. I rely on a mix of synthetic benchmarks like 3DMark Time Spy and real-world tests like playing demanding titles such as Cyberpunk 2077 or Shadow of the Tomb Raider.
Synthetic tests push the GPU to max load consistently, revealing weaknesses quickly. Meanwhile, gaming tests show how your overclock holds up during actual usage scenarios.
Monitoring for Artifacts and System Crashes
Artifacts—those weird lines, dots, or flickers on the screen—are a clear sign your overclock is too aggressive. System crashes or driver resets also indicate instability.
I keep a close eye on visual fidelity and system responsiveness during stress tests. If I spot any issues, I immediately back off the clock speeds or tweak voltages.
Stability is king; a slightly lower but rock-solid overclock beats a high but unstable one every time.
Logging and Comparing Performance Gains
Keeping records of your overclock settings and corresponding benchmark scores helps you understand what works best. I maintain a simple spreadsheet listing core clock, memory clock, voltages, temperatures, and benchmark results for each test.
This makes it easy to spot trends and quickly revert to previous stable setups if needed. Overclocking isn’t just about max numbers—it’s about consistent, reliable performance gains.
Cooling Solutions to Support Higher Clocks
Evaluating Your Current Cooling Setup
If your GPU is already running hot at stock settings, overclocking without upgrading cooling is a recipe for trouble. I always check the airflow in my case and make sure the GPU’s fans and heatsink are clean and functioning well.
Sometimes, adding a couple of extra case fans or rearranging cables for better airflow can make a huge difference before investing in aftermarket cooling.
Aftermarket GPU Coolers and Liquid Cooling
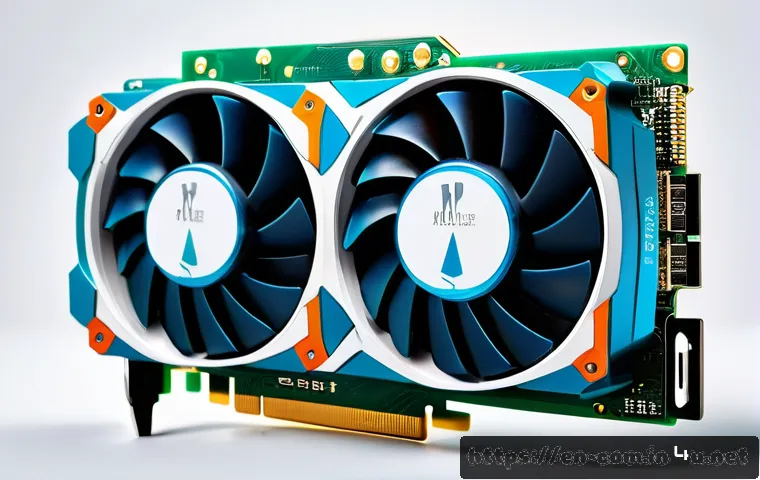
For serious overclockers, aftermarket air coolers or all-in-one (AIO) liquid cooling solutions can dramatically reduce temperatures. I once swapped to a custom air cooler and saw temps drop by nearly 15°C at full load, which unlocked an extra 100 MHz on the core clock.
Liquid cooling offers even better thermal performance but requires more maintenance and setup know-how. Either way, better cooling means higher stable overclocks.
Thermal Paste Replacement for Improved Heat Transfer
One simple yet often overlooked upgrade is replacing the thermal paste between the GPU die and heatsink. Factory-applied paste can dry out or be uneven, causing higher temps.
Applying a high-quality thermal paste can reduce temperatures by a few degrees, which matters a lot when pushing limits. I recommend doing this carefully and only if you’re comfortable disassembling your card, as it may void warranties.
Balancing Power Consumption and Efficiency
Understanding Power Limits and Efficiency Curves
Overclocking inevitably increases power consumption, but knowing how much is critical to avoid stressing your PSU or causing system instability. I use monitoring tools to track wattage during benchmarks and adjust power limits accordingly.
It’s interesting to see diminishing returns at higher voltages where power draw spikes but performance gains are minimal. Staying in an efficient sweet spot prolongs hardware life and keeps your electric bill reasonable.
Adjusting Power Targets for Stability
Most modern GPUs allow you to increase their power target limits via software. I usually bump this up by 10-15% to give the card breathing room during heavy loads.
This helps prevent throttling but should be done cautiously, combined with temperature monitoring. Increasing power limits without adequate cooling or voltage adjustments can cause crashes or thermal shutdowns.
PSU Recommendations for Overclocked Systems
If you plan to push your GPU hard, make sure your power supply can handle the increased load. I recommend at least a 650W quality PSU for mid-range cards and 750W or higher for top-tier GPUs when overclocked.
A reliable power supply with good efficiency ratings (80 Plus Gold or better) ensures stable voltage delivery, which is crucial for consistent overclocking performance.
Common Pitfalls and How to Avoid Them
Ignoring Temperature and Stability Warnings
One of the biggest mistakes I see is rushing the overclock without paying attention to heat and stability signs. I’ve learned the hard way that ignoring high temps or random crashes can lead to permanent damage.
Take your time, test thoroughly, and listen to what your GPU is telling you through monitoring software.
Overvolting Without Proper Knowledge
Increasing voltage beyond safe limits can drastically reduce your GPU’s lifespan. If you’re new to overclocking, stick to small voltage adjustments or avoid voltage tweaks altogether until you gain more experience.
Remember, a stable overclock at default voltage is better than an unstable, high-voltage mess.
Skipping Regular Maintenance
Dust buildup and dried thermal paste can sabotage your overclocking efforts by causing higher temperatures. Regularly cleaning your GPU and case, and reapplying thermal paste every couple of years, keeps your hardware running cool and stable.
I treat maintenance as part of my overclocking routine, and it pays off big time.
| Step | Action | Recommended Increment | Tools to Use | Key Warning Signs |
|---|---|---|---|---|
| 1 | Baseline Benchmark | N/A | 3DMark, Unigine Heaven | High temps (>85°C) or power draw |
| 2 | Core Clock Increase | 15-25 MHz per step | MSI Afterburner, FurMark | Crashes, artifacting, freezes |
| 3 | Memory Clock Increase | 50 MHz per step | MSI Afterburner | Texture glitches, crashes |
| 4 | Adjust Fan Curve | Custom profile starting at 50°C | MSI Afterburner | High temps, thermal throttling |
| 5 | Power Limit Adjustment | +10-20% | MSI Afterburner | System instability, shutdowns |
| 6 | Stress Test & Monitor | Run 30+ minutes | FurMark, Games | Artifacts, crashes, temp spikes |
In Conclusion
Understanding your GPU’s limits and capabilities is essential before diving into overclocking. Taking a methodical approach ensures you maximize performance while maintaining stability and safety. Remember, patience and careful monitoring are key to achieving the best results without risking hardware damage. Overclocking can be rewarding when done right, enhancing your gaming or creative workflows significantly.
Useful Information to Keep in Mind
1. Always start with baseline benchmarks to understand your GPU’s default performance and thermal behavior.
2. Incremental adjustments to core and memory clocks help prevent sudden crashes and ensure stability.
3. Monitoring temperatures closely prevents overheating and prolongs your GPU’s lifespan.
4. Customizing your fan curve can balance noise and cooling efficiency, enabling higher stable overclocks.
5. Maintain your system regularly—clean dust and replace thermal paste to keep temperatures optimal.
Key Takeaways
Effective GPU overclocking depends on respecting temperature limits, managing power consumption, and performing gradual adjustments while stress testing thoroughly. Avoid shortcuts like excessive voltage increases or neglecting cooling improvements, as these can cause instability or damage. Prioritize stability over maximum clock speeds to enjoy a reliable and enhanced GPU experience for the long term.
Frequently Asked Questions (FAQ) 📖
Q: How do I know if my GPU overclock is stable?
A: Stability is key when overclocking your GPU. After adjusting clock speeds and voltages, the best way to test stability is to run stress tests using tools like MSI Kombustor or 3DMark for at least 30 minutes.
If your system crashes, artifacts appear, or performance drops suddenly, it means your overclock isn’t stable yet. You can also monitor temperatures closely—if the GPU overheats, it might throttle or crash.
Personally, I found that incrementally increasing the clock and testing after each step saved me a lot of headaches. Taking it slow and steady ensures you get a stable overclock without risking hardware damage.
Q: Will overclocking my GPU void the warranty?
A: Generally, overclocking can void the manufacturer’s warranty because it pushes the card beyond its rated specifications. However, many modern GPUs and software tools allow mild overclocking within safe limits without automatically voiding warranties.
For example, NVIDIA’s and AMD’s official tools sometimes have built-in safeguards. That said, if you manually increase voltages or push the card too far, and it causes damage, you might lose warranty coverage.
From my experience, sticking to small, tested overclocks and keeping records of your changes can help if you ever need support.
Q: How much performance gain can I realistically expect from overclocking?
A: The performance boost from overclocking depends on your specific GPU model, cooling solution, and the tasks you’re running. On average, you might see a 5-15% increase in frame rates for gaming or faster rendering times in creative workloads.
For example, I managed to squeeze about 10% more FPS in demanding games by carefully tuning my clock speeds and fan curves. However, the gains aren’t usually massive—overclocking is more about getting every bit of extra power you can rather than doubling performance.
Also, keep in mind that pushing too hard can cause instability, so balancing speed and reliability is crucial.